Showing posts with label fun. Show all posts

Sunday, 23 February 2014

giving in to the gradient

So I promised all my insta-followers I would pop up a tutorial of the latest marbling I've done.

This is probably my favourite design (however it's not in my favourite colours) and I am going to do a black/white version tonight (for a little competition) that I'll post up tomorrow for you all to see. Either way everyone that has seen them has asked 'How did you do that?' 
And when I say 'With a tool, its actually much easier than it looks' - They do not believe me! 
So a quick tutorial to show how easy it is is just want we need. I'd love to do a video but I can't video myself! - however much a tried holding the camera with my chin/propping it up on my dvds/getting my teddy to hold it - I failed everytime.

Hopefully though this step by step will still help and you can have a go yourself and instagram/tweet me the results because I would love to see if it really is as easy I think!

what you need:  
a small dotting tool/needle if you don't have tools
two shades of polish you think work perfectly together - 
I chose Cheeky's Minted and Purpl-exed shades (these are currently available on the website at £7.00 each, just click the names to get to wear you want to go)


step one
 Apply - to a primped and prepped nail with a shiny base coat - your first polish to the bottom half of the nail like below, (don't worry if it isn't neat or straight or over half way for that matter).


step two

Apply your second polish to the top of the nail - making sure as much of the nail is covered as possible, like below:


step three

Now, quickly before it dries, swirl the tool/needle through the nail polish. Working from one colour to another in circle motions creating the below:


Now if you aren't happy with your design you can always redo it, like I did...


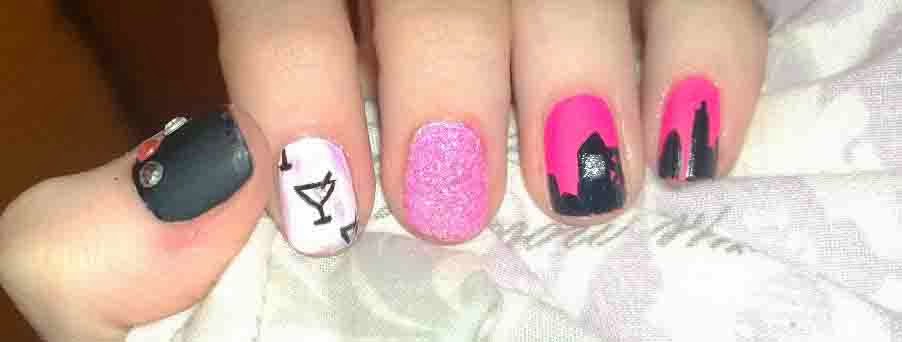
Once happy with your design you can carry on with the rest of the nails and then give yourself a shiny or matte top coat and you can end up with something like the below:


You can use this design as a feature nail or use three colours to make things more interesting!

Have fun lovelies x

@pawsandclaws101 for instagramming
@pawsnclaws101 for tweeting

Monday, 17 February 2014

sex and the citygal

I accidentally posted this the other day and hadn't even uploaded the pictures! typical me.. didn't notice till two whole days later. If I had a brain I'd be bloody dangerous!

Moving on from my tendency to be a numpty.. I was offered an amazing position at the PR agency I work for, Imagination, last week and it means I can stay in London until July like I originally planned before my previous employer had to let me go. No hard feelings.. not know I'm working for brands I actually like! So I concluded after much turmoil and struggle over the past few months I am officially a citygal again - and in celebration of this wonderful fact I did some sex and the city inspired nail art.. Hope you like :)


I used my new Andrea Fulerton Glitter Kit, Color Show in Blackout and Winter Baby and Models Own in Hot Pink as my bases. I also popped some little glitzy gems on for extra girly factor.. even if they did fall off after a day of running my hands through my super smooth hair. I also used my GOSH silver glitter nail polish for added glitter on the Big Ben I included in my city landscape. I loved drawing my little comso glasses.. now if only I had a full sized one in my hand as well...

xxxxxxxxxxxxxxxxxxxxxx :)

@pawsandclaws101 my instgram
@pawsnclaws101 my tweetgram

Thursday, 16 January 2014

The art of dotting.


When I first discovered my love of nail art, I was obsessed with the amazing Ebay buys you can get to improve your tool set. I discovered brushes, foils, 3D Fimo sticks and my favourite, dotting tools.

A great example here.

At 99p I couldn't say no, and I am so glad I didn't. I use them all the time as dotting is an easy way to jazz up a design and give it a more intricate look. Here are some designs I have done in the past few years with my favourite nail art tool.

The floral look - done completely by using tools to create a simple design.


The rainbow - using the colours of the rainbow to create a dotting illusion effect


The retro wallpaper - simple striping and dotting to give you an instant sixties look


The gradient - going from one colour to another with a spotty effect.


The tutti - frutti effect - simple marbling technique (a quick how to in yesterdays post) with added dotting.


I hope you like my designs and are inspired to try them yourself. And if you aren't sure how I did them.. just ask and I will post a quick and easy how to.

Check out more designs on my instagram:
http://instagram.com/abigaiilll1

Tuesday, 14 January 2014

Start date

This is the first ever post on my new nail blog. I have been posting my nail art on Instagram for a while now through my personal profile but would love to see if people really like the art I do. So here I go ...

This is some marble nail art I did yesterday.. I am going to post a tutorial later so you can do it yourself.