Showing posts with label white. Show all posts

Saturday, 5 April 2014

voulez-vous

so tonsillitis has struck again, that is why I've not been able to post again this week :'(
I have many many lovely ideas for posts but one thing after the other means you will have to wait. I am going home this week and to a friends for a few days. I'm hoping to do some posts there so you can see what I think of my their beauty hoarding, as I know my mother's compares to mine in no way at all, it will be very specific and fun to see where I get my beauty tips from. 

I just wanted to let you all know this and show you my classic french manicure :) I used the urcheeky crush on you matte nail polish over the top of my Andrea Fulerton white polish tips, that I did freehand (practice makes perfect but a tip for this is use a slanted straight brush to neaten up the line).


xxxxxxxxxxxxx BAHBYE xxxxxxxxxxxxxxx


Wednesday, 2 April 2014

daisy matte mani tutorial

This post is to quickly show how you can do a twist on the classic French manicure with some cite white daisies.
Your toolkit needs to consist of..
Your favourite strengthening base coat - mine is Sally Hansen Diamond Strength polish
Your best white polish - mine is currently my Andrea Fullerton White polish
A pretty pink polish - I picked my Nails Inca Gel Effect in Mayfair Lane
The ideal polish for seeds - I used my Max Factor
A small brush
Smallest dotting tool or needle
Start by giving your self a lovely base coat to keep your nails strong (if you apply nail polish often or always keep your talons painted like me then you should apply a strengthen and protecting base coat before applying your next colour or design. Try Sally Hansen Diamond Strength, I've found my nails to be really brittle in the past but now that I use this base coat they are long and tough!).
Once your base coat is dry use your small brush (if you don't have nail brushes use a lipstick or eye shadow brush like the one below) to paint your white petals. Don't worry if you need to do two coats to get them perfect your top coat with smooth out any lumps and bumps.


Once your petals are just the way you want them and the polish is dry, you can start to add some texture. Do this by using your brush again to pat some pink polish over the white lightly. You can also do this with yellow or purple (the first time I did this mani I used yellow and it looked a little like eggs, don't worry if you don't like how they look at this stage the dots will make them perfect!) Then use the dotting tool to create the dots in the centre of your flower, big and small, whatever size or shape, it doesn't matter it all works when it comes to flowers!


Then once your daisies are totally dry you can apply a matte top coat to finish them off and keep them perfect. And you should get something like the below:


Good luck ladies xxxx

Remember my insta and twitter tag has changed to @curiousitybty! :D

Tuesday, 11 March 2014

the positive in seeing the negative

You, my lovely followers and friends have been missing out. Yes indeed, I speak the truth. you have been missing out on some of my nail art lately - unless you follow my instagram/twitter - as I little miss naughty nail blogger haven't been uploading all my nail art to my blog.

In this case I have decided to show you not one, but TWO lots of nail art I have done (one you have seen in technique before, but not in colour) and the other is fresh as a daisy just for you.

Firstly I wanted to show you the nail art I entered into the @glittr Instagram competition with a black and white theme... I obviously didn't win (sniffles) or you would have heard my excitement from miles away (wherever you may be). Here I showed you one of my favourite techniques in a a design I hadn't tried before and ended up LOVING so much I want to do it in different colours everyday, however I am too much of an experimenter to do that. I used my Blackout and Winter Baby Color Show polishes by Maybelline for this design and if you look at my previous post there is a quick how to that explains how EASY it is to achieve this design.


The next is a design inspired by designs by @naildecor on instagram. I love the negative space trend that has been circulating lately, it's so funky and fresh (yes I can say fresh). I have tried it a couple of times here  for Valentine's day and here for my denim inspired design. I think I am getting the hang of it and my new brushes definitley help, so if you are going to try negative space here are my tips:

1. Use brushes! - To paint and to clean up and to neaten up
2. Try cotton buds/pads to create your negative space - Using cotton buds to rub out the area you want is tricky so try wrapping a varnish remover soaked cotton pad around the end of a dotting tool/brush (or anything long and thin).
3. Experiment where possible - whether you own a nail wheel or just use one clean nail to try different designs over and over as this is the best way to get used to being patient and steady handed (this rule applies to most if not all detailed designs!)

I used a random blue polish with no label that I got on a knock off market on Brick Lane (haha!) and my Andrea Fulerton White Polish that came in a glitter kit of hers, I topped it off with my new Rimmel Matte Finish Top Coat.


Let me know what you think lovelies xx

@pawsnclaws101 to tweet me
@pawsandclaws101 to instagram me


Monday, 17 February 2014

sex and the citygal

I accidentally posted this the other day and hadn't even uploaded the pictures! typical me.. didn't notice till two whole days later. If I had a brain I'd be bloody dangerous!

Moving on from my tendency to be a numpty.. I was offered an amazing position at the PR agency I work for, Imagination, last week and it means I can stay in London until July like I originally planned before my previous employer had to let me go. No hard feelings.. not know I'm working for brands I actually like! So I concluded after much turmoil and struggle over the past few months I am officially a citygal again - and in celebration of this wonderful fact I did some sex and the city inspired nail art.. Hope you like :)


I used my new Andrea Fulerton Glitter Kit, Color Show in Blackout and Winter Baby and Models Own in Hot Pink as my bases. I also popped some little glitzy gems on for extra girly factor.. even if they did fall off after a day of running my hands through my super smooth hair. I also used my GOSH silver glitter nail polish for added glitter on the Big Ben I included in my city landscape. I loved drawing my little comso glasses.. now if only I had a full sized one in my hand as well...

xxxxxxxxxxxxxxxxxxxxxx :)

@pawsandclaws101 my instgram
@pawsnclaws101 my tweetgram

Sunday, 9 February 2014

my sweet nonexistent valentine

This Valentines Day like all the ones that have past in my life, 21 of them to be exact will be spent all by my lonesome - Minus those I have spent with a card from my crush in Primary School or a mystery card from my Granda. But don't worry I don't at all feel lonely because I spend it with the Scream films - something I love verrrrryyy much and other single ladies :)

See technically its about being with those you love ... Ipso Facto I do it right. 

I also do Valentines nail art :) well I do this year.. I've done this simple Valentines mani with a transparent heart and dotting to jazz my Valentines up. I used my dotting pen from Rio Professionals in Red, my Color Show by Maybelline in Winter Baby polishes, a cotton bud dipped in nail polish remover to remove the white and create a clear heart and a shiny top coat of Sally Hansen Insta-Dry.


Hope you like, Have a lovely Valentines :) xxxx

@pawsandclaws101 INSTAGRAM
@pawsnclaws101 TWITTER


Monday, 27 January 2014

paisley princess

When I was about 13 years old, my mum kept up her time old tradition of the Pyjama Christmas present - given on Christmas Eve it is a gift that I have gotten and given for as long as I can remember - But this one particular Christmas my mother gave me the best pj's I ever got! Pink Paisley.. need I say more?

This was when I realised my adoration for the intricate and ever so vintage look that paisley patterns give. Granted, the paisley shirt only your Grandad buys in a second hand charity shop and wears when he decides he is 'Super hip and trendy' like the wonderful yet unfortunate David Tennant, is not a good example...


It is a pattern I can pretty much love ANYWHERE :)

So it is only natural that over time I have done many paisley designs when it comes down to my nail art, testing different styles, shapes and colours to see which I like best...


Some where ugly as, some where Saved By The Bell inspired, some where simple and some where favourties.

Today I have done some inspired nail art based on the current paisley I have picked out for my new and very different laptop background - I have gone from pink and fluffy to monochrome and sharp. All it took was Maybelline's Colour Show in Blackout with a matte top coat from George Asda Matte Manicure range in clear and a White Pearl Rio Professional Nail Care pen :) So here it is... Inspiration to final design ...


Instagram me your paisley @pawsandclaws101
Or tweet me :) @pawsnclaws101

Abigail xxx

Sunday, 26 January 2014

the magic of a white base

When doing intricate or simple nail art, a white base is the easiest and most attractive option .. undoubtably.
I tend to resort to my trusty white and must have gone through 10 bottles of it this year! Especially over Christmas...
So, seeing as the colour white is the right one for me, it's best to get a really good quality brand. That does not mean go for the most expensive.. never do that. This year, I found the easiest way was to try as many as I could! It's the way I found my favourite white and black and clear top coat.. Practice makes perfect in this business.

Ergo this is a tried and tested post.. I have picked out all my old whites and gotten enough out to test one nail from each bottle. Just to show you lovely people which is the best and why you should buy it.. It saves you the journey of using them all :)

Low cost, low quality?

NOT SO BEST: Primark: Angelica Nail Colour in Snow White £1.00

I don't mean to be harsh but I like a nail polish that doesn't crust in the bottle over a matter of months.. I have had this colour for as long as some of my other polishes and it is the only one that has managed to completely seal over. So I am unable to do a quick test now.. HOWEVER.. Once upon a time (4 months ago) This was a decent nail polish. It went on nicely and came off nicely as far as I remember.. But unfortunately.. It doesn't match up to the next nail polish I had for a single pound!


BEST: George, Asda: Manicure in Natural White £1.00

'When money is tight - nip to trusty Asda.' Mum's motto must be something along those lines. It's actually true, as a student I've discovered amazing cheap tights and a dish cleaner that works miracles. So when I had little to no money over Christmas and was in desperate need of a white, I jumped in the car with mum and grabbed one of these nail polishes.

Even though the bottle is so unbelievably tiny the result wasn't too bad.. The colour is nice however it does come out a little runny meaning two generous coats and a bit of clean up. Then, I would say that about most white nail polishes. So for the price I would definitely recommend this one over the Primark polish.


Go on.. Just spend a little more.

IT AINT NO.1 BUT: Miss Sporty: Et Voila Tip Whitener, Extra White Effect Manicure £1.99

Now you must be asking yourself, why is she using a tip whitener as a nail polish?!, and the answer is that the only difference is the name.. and in this case the slanted brush.
Bought in a time of desperate need - It is a low priced polish but it is such a good quality there is a reason it isn't priced at a pound like the loved George Manicure varnish. When I first bought it months and months and months ago it was silky and you only needed one coat of it. Unfortunately it didn't last very long - not due to the fact I do my nails 3/4 times a week - but due to it living up to it's cheap stereotype. That is why I rated it lower than the best white polish I've ever had. Now a gloopy mess - it comes at number 2 in my rankings.


NUMERO UNO: Maybelline, Color Show by Colorama in Winter Baby £3.99

In this particular case, spending more is better, however this is not the most expensive white nail polish and it doesn't need to be.
Silky and light, this nail polish is my favourite of them all. The only downside is having to use two coats (but like I said, this is the case with most white polishes). It gives the best results and lasts a long time. There really isn't much more to be said other than I bought it in Boots along with another one and a black in the 3 for 2 offer (so get yourself down there is what I'm saying ;) )


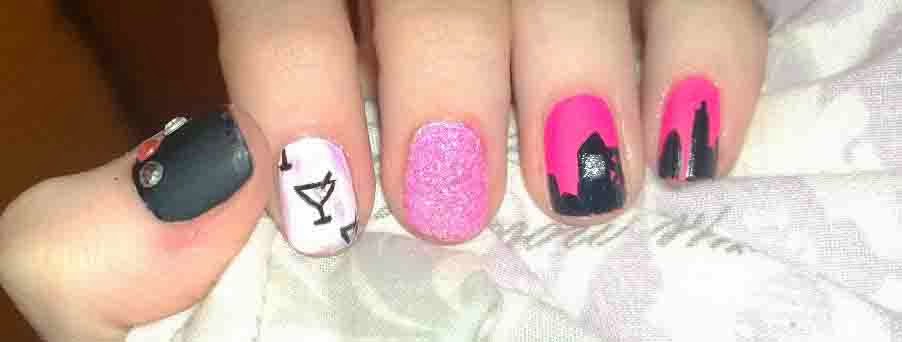
I hope you like the designs I put up to show how well a white base works, and why it is soooo important to have a decent white polish in your bag of tricks.

Happy white polish hunting, I hope I have narrowed the field for you! :)


Abigail xxx

@pawsandclaws101 for Instagram
@pawsnclaws101 for Twitter

Thursday, 23 January 2014

Saturday, 18 January 2014

Marble marvel


My obsession with marbling is becoming obvious..

This design shows all the different techniques you can use to give your nails some flair.